Scheduled Scene Recall |
|||
Note:
|
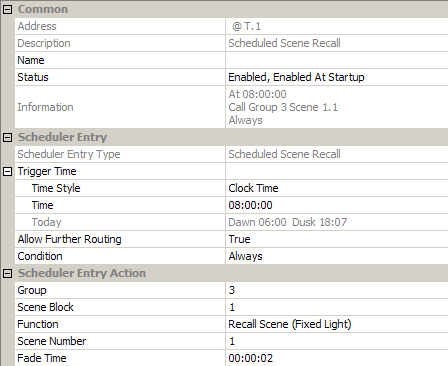
To configure a scheduled scene recall, ensure that the scheduler entry is selected in Scheduler view, and in Properties do the following to configure the entry:
This is the time at which the scene is called by this scheduler entry.
Click in the Time
Style field and click ![]() .
.
Select either 'Clock Time' (for 24-hour clock time), 'Dawn Time' or 'Dusk Time' (to set the scheduler entry to activate, i.e. the scene to be called, relative to the pre-determined dusk or dawn times).
If you chose 'Clock Time' in the Time Style field, to set the time at which the scene is called:
Click in the Time
field and click ![]() .
.
Enter the time to recall the scene (in hh:mm:ss).
Click ![]() to apply the changes. The scene
will be called at this time.
to apply the changes. The scene
will be called at this time.
Tips:
|
If you chose 'Dusk Time' or Dawn Time' in the Time Style field, to set the time at which the scene is called (relative to the Dusk / Dawn time):
Click in the Offset
field and click ![]() .
.
Enter the time (in mins) before or after the Dusk / Dawn time, at which the scene is called.
Click ![]() to apply the changes. The scene
will be called at this time.
to apply the changes. The scene
will be called at this time.
By default, routing entries associated with a scheduled scene recall are permitted. For example, if scene 1 is called and there is a scene link to scene 2 set up in Routing Entries, then scene 2 will also be called.
If you want to ignore any routing entries associated with the scheduled scene recall:
Click in the Allow
Further Routing field, and then click ![]() .
.
Select False from the drop-down menu.
Click ![]() to apply
the changes.
to apply
the changes.
If you want to apply a condition to the scheduler entry:
Click in the Condition
field and click ![]() .
.
Select a condition from the drop-down menu.
Click ![]() to apply
the changes. The scene condition
is applied.
to apply
the changes. The scene condition
is applied.
Click in the Group field, and then enter the group of the scene.
Click in the Scene Block field, and then enter the scene block.
Click in the Function
field, click ![]() , and then select
between 'Recall Scene (Fixed Light)' and 'Recall Scene (Constant Light)'.
, and then select
between 'Recall Scene (Fixed Light)' and 'Recall Scene (Constant Light)'.
Click in the Scene Number field, and then enter the scene number.
Click in the Fade Time field, and then enter the fade time (in hh:mm:ss:ms).
Click ![]() to apply
the changes. The scene to be recalled
by the routing entry is set.
to apply
the changes. The scene to be recalled
by the routing entry is set.