Corridor Hold |
|||
Notes:
|
This routing entry allows commands to be sent to a group / scene block (by default, but can be configured otherwise, by cancelling the trigger scene recall), and then redirected to another group / scene block.
This routing entry is useful, for example, when a command is sent to a group in an office (e.g. presence is detected by the PIR Sensor in the office), and you want the lights to be on in the corridor as well. A command is sent to the PIR in the corridor, and it behaves as if it has detected presence in the corridor.
Note:
|
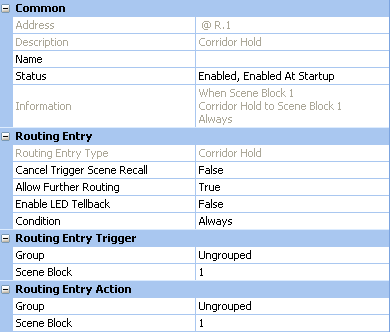
To configure a hold redirect, ensure that the routing entry is selected in the Routing Entries view, and then do the following in the Properties View:
If you want the scene recall command not to be sent to the initial group / scene block:
In the Routing Entry section, click in the Cancel Trigger Scene Recall field.
Click ![]() , and then select True.
, and then select True.
If you want to permit further routing entries from occurring:
In the Routing Entry section, click in the Allow Further Routing field.
Click ![]() , and then select True.
, and then select True.
If you want the LED on the button of the panel ( control device ) to indicate the scene called upon the redirect:
In the Routing Entry section, click in the Enable LED Tellback field.
Click ![]() , and then select True from the drop-down menu.
, and then select True from the drop-down menu.
Apply a condition to the redirect:
In the Routing Entry section, click in the Condition field.
Click ![]() , and then select a condition from the drop-down menu. See Conditions for more information.
, and then select a condition from the drop-down menu. See Conditions for more information.
Enter the group and scene block from which you want to redirect the trigger.
In the Routing Entry Trigger section, click in the Group field, and then enter the group
Click in the Scene Block field, and then enter the scene block.
Enter the group and scene block to which you want the trigger to be redirected, and the action performed.
In the Routing Entry Action section, click in the Group field, and then enter the group.
Click in the Scene Block field, and then enter the scene block.
Click ![]() to apply the changes.
to apply the changes.